Showing posts with label DIY. Show all posts

Wednesday, May 14, 2014

Beauty Bloggers on Instagram

As the weather gets warmer and sweaters are changing to tees, many of us are looking to discover the season’s new trends or to mix up our look. To make the search a little easier, I’ve put together a few unique beauty bloggers with creative designs that will brighten your newsfeed.

For nails: @Wahnails
The blog features designs from the popular Wah Nail Salon in London. The blog has a vast array of designs from trendy colors to really complicated, intricate designs. Given, the diversity of styles, there are enough designs to try out for the summer and beyond.


Other suggestions: @fleryrosenails, @stephstonenails, @jinsoonchoi


For clothing: @troprouge
For a diversity of looks @troprouge is a unique blog that features outfits and peaks into the blogger, Christina’s, everyday life. She is a model and blogger who runs her own website as well.


Other suggestions: @sincerelyjules, @thenativefox, @blaireadiebee, @weworewhat


For eyes: @tal_peleg
This blog is run by makeup artist Tal Peleg and although the designs aren’t the most wearable, it will most definitely add flare to your newsfeed.


For more wearable designs I suggest @Vegas_Nay. With nearly 2 million followers she is a strong force in beauty world. Her page features lip and eye combos as well as displaying which kits and shades were used. She also features the creations of other make-up artists so the design possibilities become endless.


Other suggetsions: @iinala, @makeupbyman

-Danielle Kavanaugh

Friday, March 14, 2014

My Laptop, A Sticker Story

I was sitting in my writing class a few weeks ago when I had an awkward conversation. Granted, most of my conversations are awkward, but this one probably lands in the top twenty. A random guy walked up to me, and I mean a genuinely random person, and started talking about The Fresh Prince of Bel-Air and how it was cool that I liked that show. I thought to myself, “How does he know this about me? Did I put that on Facebook? Wait, I don’t know him at all. Does my outfit look extra 90’s today?” I was definitely not happy, free, confused, and lonely (Taylor Swift style). I was more confused, questioning, creeped out and incredibly curious.

After about two minutes I asked just how exactly this guy knew that Fresh Prince held reign over my Saturday mornings for years. He paused for a couple seconds, more than likely noting how my face formed a curiously terrified expression. “Oh,” he said. “I saw it on your laptop.”

In less than five seconds, everything made sense to me. That day was the first time I brought my laptop out into the wild that is a DePaul University classroom to be seen by the world. You see, I was initially timid to bring my laptop anywhere. I had a gaggle of stickers that were all very close to me. I didn’t want my passions to get judged by a bunch of 12 year-olds at whatever Starbucks I was pretending to do homework in because then I’d feel like a part of me was being judged by unrecognizable faces.

So anyway, I finally stopped caring if people knew the things that I felt most passionate about (hello One Direction stickers) and proudly whipped my laptop open amongst my peers. Though, like I said, I was a bit shy in the beginning, I started to love the boldness of my stickers more and more each day.
As time has gone on, more classes have been attended and less cares have been given. I have actually made quite the number of friends simply based off of my laptop stickers. For a quick story, I was sitting in Brownstones struggling to do my math homework (Shout-out to Professor Jim “Jimmy” Scheidhauer) and three different people came up to me saying how much they loved a sticker or two of mine. Not only did I feel like I made new friends, but I was also flattered.

So basically, I’m an advocate for laptop stickers. Any shape, size, style, whatever. They’re relatively low in price—with companies like Redbubble offering 50% off your total after you purchase six stickers, which is a lot easier than it might sound. Or, if you’re feeling rebellious, head on over to Columbia, like some of my friends have done, and grab the seemingly endless amounts of cool promotional stickers that they hand out. They’re so artsy over there that even a school sticker looks like a concert poster.

Below are some of my favorite laptop sticker looks at DePaul University (outside of my own laptop, of course!).


Kristin Stahlke:


Her favorite sticker: Vampire Weekend sticker because it’s her favorite band (middle)

Bethani Randolph:


Her favorite sticker: The Legend of Zelda sticker because of the childhood memories (far left corner)

Lucy Steven:


Her favorite sticker: Chicago Blackhawks because they’re her favorite sports team (middle)

Sara Autio’s laptop:


Why she loves having a statement sticker: “I feel like it tells everyone that I love photography and that it’s my one true passion. A really important person gave it to me so it makes me happy to have that reminder of them.”

- Leah 

Monday, March 10, 2014

Start Taking Care of Your Skin

How often do you really take care of your face? Our daily usage of foundation, powder, and other sort of make-up effect skin negatively causing it to look dry, gloomy. Our skin needs vitamins and caring as much as the rest of our body. 

Number one solution is, of course, drinking plenty of water and washing your face every night removing the dirt that gathered throughout the day. Another solution is to use facial mask once a week to give that right nutrition and treatment to your skin. Using a facial mask every Sunday night has become my routine. It does not have to be on a Sunday night, of course. However, it’s easy because it is the end of the week and you want to start your new week with bright, healthier skin. My routine is take a shower, get everything for the next day, and put on my face mask. By using face mask once a week, your skin gets the essential vitamins and nutrition for the week. As a result, you have a glowing, healthy skin.

There are many types of facial masks. I’ve tried many facial masks and found that TonyMoly brand facial masks are so far the best masks I have tried. You also may try different brands to see which ones you like the best.Here is my favorite TonyMoly Pureness100 that has nine different ingredients:


Light blue (hydrating), snail (skin damage care), honey (skin soothing), purple (elasticity), caviar (nutrition), pearl (brightening), coconut (moisturizing), green (strengthening skin barrier).

- Misheel

Wednesday, February 19, 2014

Purple Haze


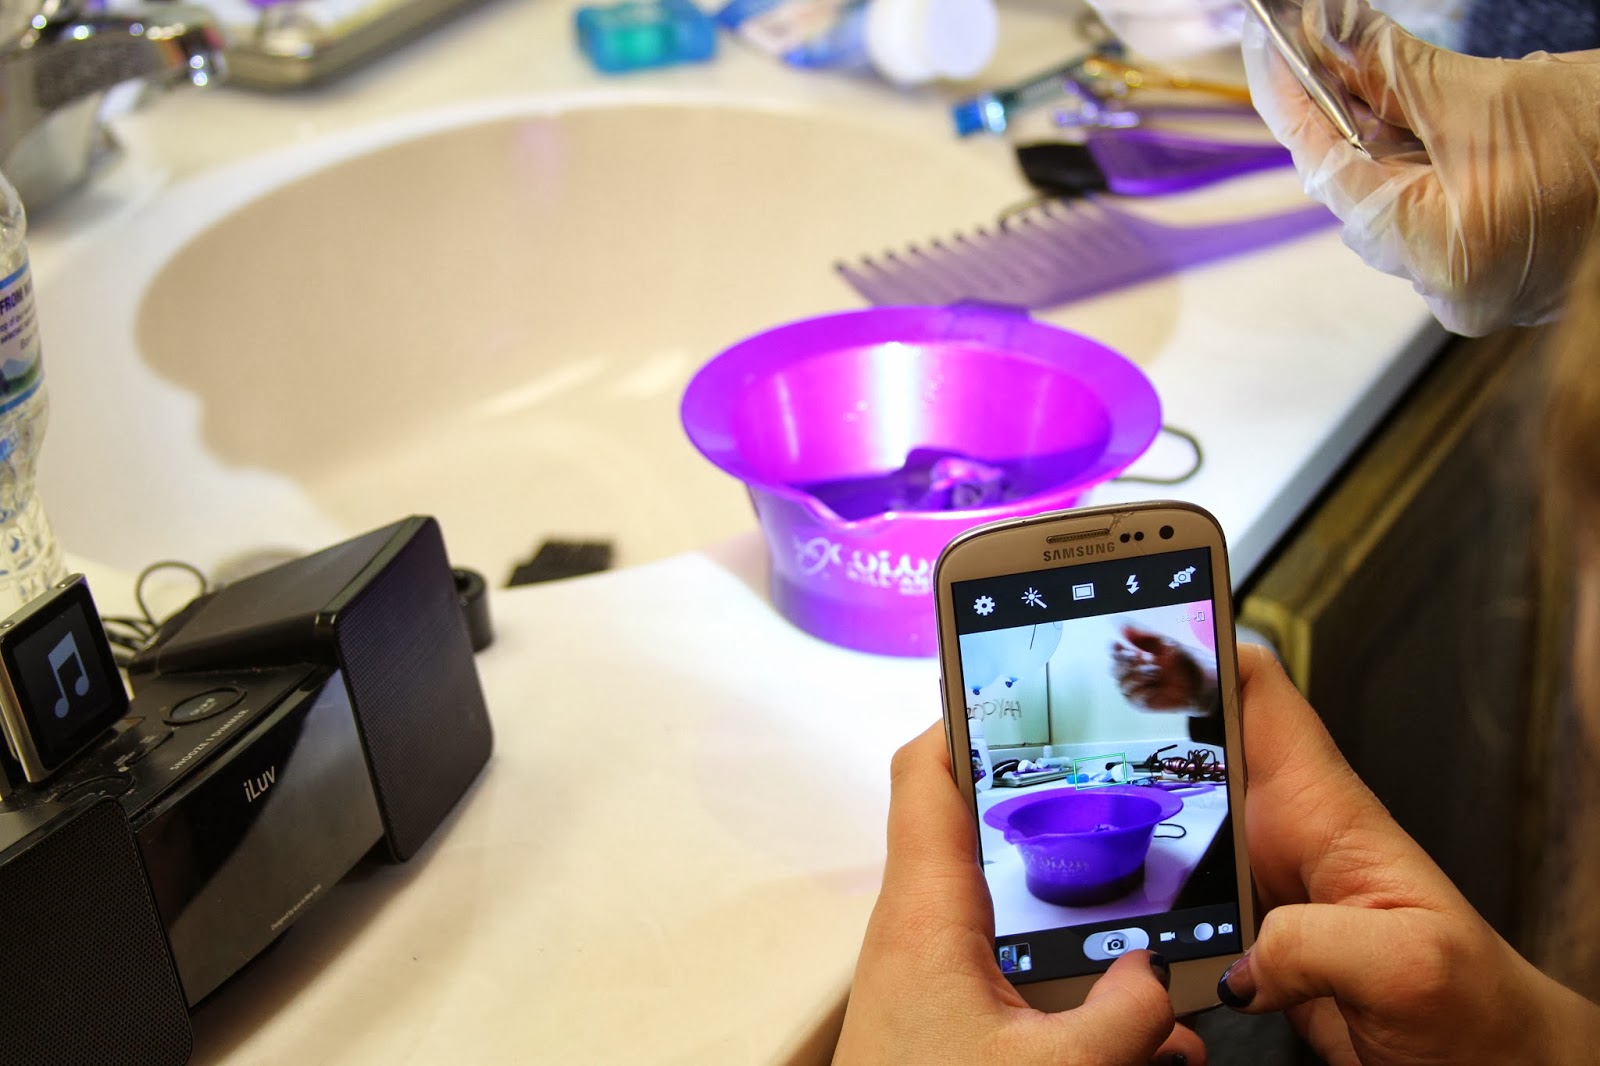
From time to time I’ve been known to have purple hair. More than a handful of people have asked me just how I achieved such a color from inside the bathroom walls of University Hall (shhh, don’t tell my RA). So the last time I dyed my hair (about a week ago), I convinced some friends to help me document the process. 
On top of these riveting images displaying me wrapped in an old purple towel, each step for acquiring a lavender head of hair is documented.
First and foremost, the tools needed:
1. A head of hair (an obvious necessity, but hey, it counts)
2. Bleach (I used this)
3. Hair dye (I used this and this)
4. Container to put your bleach and hair dye in (I used this)
5. Shampoo (I used this)
6. Comb
7. Hairdryer
8. Old Towel
9. Old T-shirt
10. An Old Hair Tie
11. Hair Clips (I used these)
12. Shower


Step One: 
Make sure you have not washed your hair 24 hours prior to this DIY activity. In order for the new color to truly adhere to your hair, there should be natural oils.
Step Two:
Brush out your hair. Personally, my hair seems to look like I have a slight perm at all times, so really make sure everything is sorted out. 

Step Three:
Open up your bleach kit, that comes equipped with developer as well, and follow the instructions on the side of the bottle. This is also when you’ll get your handy-dandy hair dye cup out to have a final destination for said bleach.

Step Four: 
Separate your hair into four sections. It might help to visualize dividing your hair in a way that resembles a mathematical plus sign on top of your head. I don’t know if that visual is helpful, but hey, that’s the best way to describe it.
 

Step Five:
Generously apply bleach and developer to every section of your head, as high as you’d like your final color to go up your head.

Step Six:
Let the bleach sit, the time depends on the darkness of a person’s hair. In order to help determine the amount of time you’ll need, I’ll have you know that I let my bleach sit for 35 minutes.
Step Seven:
Rinse out the bleach with shampoo. For best results, use the recommended shampoo listed earlier in this post to help get your hair as light as possible. 
Step Eight:
Blow dry your hair and brush it out.

Step Nine:
Pour the hair dye into the same container that your bleach was in (make sure you have washed out the container!) and mix with a generic conditioner to dilute the hair dye.


Step Ten:
Section your hair off and apply hair dye to desired locations (make sure you have also cleaned the brush off from your previous use with the bleach!)

Step Eleven:
Pin your hair with the dye back and let it sit for about 45 minutes. The longer you let the color sit, the deeper the color will be.

Oh, look. It's me patiently waiting.


Step Twelve:
Rinse your hair out with water in the shower.
  
Step Thirteen:
Instagram the process, naturally. 


Here's the final result for me via my sassy Instagram account:
  
  
I hope these step-by-step instructions paired with visual documentations help all of you seeking out a new style! And can we all just have a quick laugh about this entire hair process happening in the dorms that may or may not be considered a policy violation? It’s all in the name of creativity.
- Leah

Thursday, February 6, 2014

Makeup Tutorial: Orange is the New Red

Here’s the thing about makeup; it’s difficult. At least for me it sure is. Luckily there are people like my good friend Bethani Randolph, a fellow DePaul University student, who I can run to for advice.

Bethani is a studio art major who has worked with many professional makeup artists, most notably Stella Mikhail, who was Cindy Crawford, Sarah Jessica Parker, and Oprah’s makeup artist for years! After popular demand, Bethani finally made a make-up tutorial, with more to come in the future. So here she is, my personal makeup hero, making her YouTube debut with Orange is the new Red.


For all business inquires, contact Bethani Randolph via email: bbethanii@gmail.com

- Leah

Tuesday, February 4, 2014

The Look for Less: Miranda Kerr

Miranda Kerr The Look for Less


As a Victoria's Secret Angel, Australian beauty Miranda Kerr is known for her iconic street style. She is often photographed out and about in New York City where she resides. Her style is effortless yet chic. Kerr leans towards simplicity: neutral colors and clean lines. 

In the above look, she wears a black swing skirt with a classic white button up under a jean jacket. By pairing the look with chocolate ankle booties, a leopard bag, and a floppy hat, Kerr adds just enough flair. A subtle red lip completes the look. This particular outfit is easy to achieve, especially on a budget since each of the items are simple and commonplace in most stores. 


- Meghan